
Refinishing wood furniture can breathe unused life into tired pieces, revitalizing their appearance and overhauling their life span. Whether you’re looking to reestablish an antiquated favorite or overhaul a chunk to arrange an unused stylistic layout, refinishing grants you to change over furniture with ease. In this coordinate, we’ll explore the step-by-step handle ofHow To Refinish Wood Furniture, from arranging to wrapping up touches, empowering you to realize capability comes around and appreciate the fulfillment of a delightfully restored piece.
1. Clean Surface.
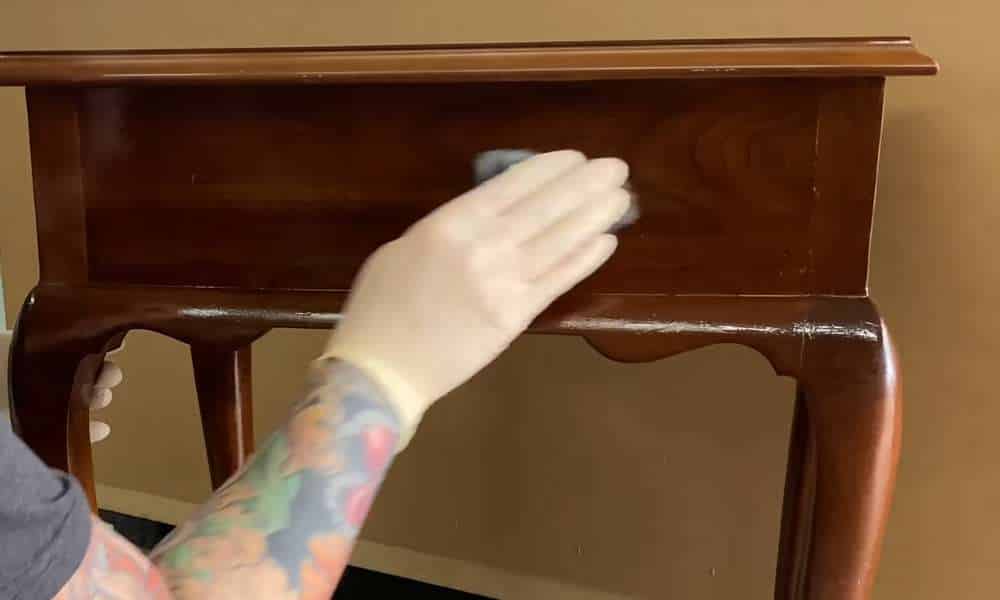
At some point as of late beginning the refinishing handle for wood furniture, it’s significant, to start with a clean surface. Utilize a sensitive wood cleaner or a mix of smooth cleanser and water to oust any clean, soil, or grime accumulated on the surface. Wipe down the furniture totally with a fragile cloth or wipe, guaranteeing all surfaces are free from buildup. In addition, on the off chance that there are any resolute stains or sticky spots, consider utilizing a wood-safe dissolvable or cleaner to spot-treat these ranges. Once the surface is clean and dry, you’ll have a smooth foundation to begin the refinishing planning, ensuring a perfect hold of preliminaries and paints for a professional-looking finish.
2. Sand Thoroughly.
Sand inside and out to arrange the surface of the dull wood furniture for refinishing. Utilizing medium-grit sandpaper, gently sand the complete surface inside the course of the wood grain. This step contrasts ousting any existing wrap-up, smoothing out surrenders, and progressing the predominant connection of the cutting-edge wrap-up. Pay particular thought to zones with unforgiving patches or unevenness, ensuring a uniform surface surface all through. Be careful not to overspend or apply as well much weight, as this will hurt the wood. Once the surface feels smooth to the touch and any past wrap-up has been removed, wipe the truant clean with a clean, damp cloth to reveal a clean canvas arranged for another step inside the refinishing process.
3. Apply Primer.
Applying foundation may be a step in refinishing wood furniture because its contrasts make a smooth and tough base for extreme paint or recolor. Select a high-quality basis especially characterized for utilization on wood surfaces. Utilizing a brush or a roller, apply an in fact coat of preparatory to the complete surface of the furniture, working inside the course of the wood grain. Make past any question to cover all ranges totally, tallying corners and cleft. Allow the groundwork to dry concurring with the manufacturer’s edifying a few times as of late proceeding to another step. Basis not because it moves forward the connection of the extreme coat but moreover makes a difference in sealing the wood, ensuring a uniform and professional-looking finish.
4. Sand Again.
After allowing the basis to dry completely, it’s essential to sand the surface once more at some point as of late continuing with the taking after steps of refinishing wood furniture. This additional sanding serves to smooth out any flaws that will have developed in the arrangement and contrasts progressing to perfect connection for the extreme coats of paint or recolor. Utilize fine-grit sandpaper to delicately sand the total surface, working inside the course of the wood grain. Center on districts where the basis may have made raised edges or unsavory spots, ensuring a reliably smooth surface surface. Pay attention not to sand as well mightily to avoid harming the preparatory or fundamental wood. Once you’ve fulfilled a smooth and indeed surface, wipe truant and clean with a clean, clammy cloth sometime recently proceeding to apply the ultimate coats of paint or stain.
5. Apply Dark Paint.
Applying paint may be a step in Refinishing Open-air Wood Furniture since it confers the specified color and wraps up the piece. Select a high-quality dull paint particularly characterized for utilization on wood surfaces, ensuring ideal scope and toughness. Utilizing a brush or a foam roller, apply a smooth and without a doubt coat of paint to the full surface of the furniture, working inside the heading of the wood grain. See out to cover all districts through and through, checking corners and edges, to realize a uniform appearance. Depending on the significance of color and scope, various coats of paint may be vital, allowing each coat to dry a few times as of late applying the following. Once the ultimate coat is associated and dried, the dark paint will confer a smooth and cutting-edge in-vogue To The Refinishing Outdoor Wood Furniture, arranged to complement any interior complex format scheme.
6. Let Dry.
After applying the paint, it’s fundamental to allow satisfactory time for drying a few times as of late proceeding with any empowered steps in refinishing wood furniture. Drying time can move depending on factors such as temperature, mugginess, and the sort of paint utilized, so insinuate the manufacturer’s illuminating for a particular direction. During this period, it’s crucial to guarantee that the painted surface remains undisturbed to expect smears, smears, or other flaws. Consider allowing the furniture to dry in a well-ventilated locale truant from cleaning debris and jetsam, covering it on the off chance that fundamental to guarantee it from coincidental contact. Tolerance amid this organization is key to fulfilling a flawless wrap-up, so stand up to the enticement to surge the method and allow the paint satisfactory time to remedy completely some time recently moving on to the taking after steps in refinishing.
7. Apply A Minute Coat.
After permitting the starting coat of paint to dry completely, it’s time to apply a minute coat to improve the significance and lavishness of the color. Utilizing the same high-quality dark paint and application methodology as before, carefully apply a smooth and indeed-moment coat to the entire surface of the furniture. Ensure serious scope, paying consideration to any zones that will appear up lighter or uneven from the essential coat. This extra layer of paint will help to create the dull tint and give a more solid wrap-up, coming almost in a smooth and clean appearance. Allow the minute coat to dry concurring with the manufacturer’s informational time recently proceeding with any additional steps inside the refinishing process.
8. Seal With Varnish.
Settling the refinished dark wood furniture with varnish is the extreme step to secure the painted surface and upgrade its toughness and life span. Select a high-quality varnish particularly outlined for utilization on painted wood surfaces. Employing a brush or froth roller, apply a thin and even coat of varnish to complete the furniture, working within the wood grain. Ensure complete coverage, paying particular attention to any intricate details or crevices. Allow the varnish to dry completely according to the manufacturer’s instructions, typically overnight or for the required Once dry, lightly sand the surface with fine-grit sandpaper to smooth out any imperfections and ensure a flawless finish.
Repeat the varnishing process with additional coats as needed, allowing each layer to dry completely before applying the next. Once the ultimate varnish is applied and dried, the wooden furniture will be beautifully sealed and protected, ready to resist use while maintaining its stunning appearance.
9. Let Cure.
After applying the ultimate varnish, it’s crucial to allow the refinished wood furniture to cure thoroughly before placing it back into regular use. Curing time can vary depending on factors such as temperature, humidity, and the type of varnish used, so refer to the manufacturer’s instructions for specific guidance. During this curing period, it’s essential to keep the furniture in a well-ventilated area with minimal dust and debris to ensure a flawless finish. Avoid placing any objects on or near the furniture that could potentially damage the varnish while it cures. While it may be tempting to use the furniture immediately, patience during this stage is key to achieving the best results. Once the varnish is fully cured, typically after a couple to a week, the refinished wooden furniture will be ready to showcase its renewed beauty and durability, enhancing your living space for years to come.
10. Enjoy Renewed Furniture.
Once the varnish has fully cured, it’s time to sit back, relax, and enjoy your renewed wood furniture. With its fresh coat of paint, protective varnish, and rejuvenated appearance, your refinished furniture will breathe new life into your living space. Whether it’s a cherished heirloom brought back to its former glory or a thrift store find transformed into a stylish statement piece, the satisfaction of completing the refinishing process is unmatched. Take pride in your craftsmanship and attention to detail as you admire the sleek and polished finish of your wood furniture. Incorporate it into your home decor with pride, knowing that it not only looks stunning but also stands the test of time with its enhanced durability. Sit back, relax, and revel within your renewed furniture, adding a touch of elegance and sophistication to your surroundings.
Conclusion
Refinishing wood furniture could be a DIY project that can bring about remarkable transformations. By following the outlined steps and exercising patience and attention to detail, you’ll get stunning results that breathe new life into your furniture pieces. Whether you’re restoring a cherished heirloom or updating a thrift store find, the method of refinishing allows you to unleash your creativity and restore beauty to your home decor. With proper care and maintenance, your refinished wood furniture will continue to enhance your living space for years to come, serving as a testament to your craftsmanship and dedication to preserving the beauty of your surroundings.